google search this blog, doesn't always work

Thursday, December 8, 2011

what about frozen steaks under the broiler?

I had never cooked any steak under the broiler, let alone frozen steak.

As I said in my last post, I like my steaks grilled from a frozen solid state; it turns out good that way.

Besides, that saves the hassle of having to defrost them!

I wondered how frozen steaks would turn out, cooked under the broiler.

After all, a broiler is just an upside down grill, right?

Put the top rack closest to the top BEFORE you turn the broiler on.

Then broil the steaks, turn once, broil some more until done. That's it!

I used the Lodge 12 inch square grill pan, which doubles as a broiler pan.

can you grill frozen steaks on a volcano?


As you can see from the picture, it had snowed.

And as a result, my propane grill in the backyard was covered in snow.

I wanted to grill steaks for dinner, but not in the middle of the snow!

I've decided that I like my steaks grilled from a frozen solid state; they turn out juicy and medium rare.

But I had never used a volcano stove to grill frozen steaks (only defrosted steaks).

So, I would soon find out that a volcano stove is indeed fine for grilling frozen steak.

Of course, you can't really marinate a frozen steak. I just add garlic salt and pepper afterwards.

Sunday, November 20, 2011

Ninth recipe created by me: garlic butter bacon pasta

Because I added my own little twists to these two pasta recipes, I decided to deem the 9th recipe created by me.

I name it garlic butter bacon pasta.

Similar to shrimp scampi, except for the fresh herbs and bacon bits.

It can be made with shrimp or crab (or both), and with sage or thyme (or both).

The sage or thyme have to be fresh! Dried will not do in this case.

You cook your pasta separately.

Then you melt some butter in a skillet, and saute some minced garlic along with fresh sage or thyme.

Add some cooked shrimp or crabmeat; saute some more.

Toss with the pasta, and top with bacon bits and parmesan cheese.

It's an awesome thing to do with leftover spaghetti.

Sunday, November 13, 2011

eighth recipe created by me: cheddar melt lasagna

This recipe was created by accident, based on what I had available, as most of my recipes are.

It's cheddar melt lasagna. Note I said cheddar melt, not cheddar cheese. There's a difference.

Cheddar melt is a combination of shredded cheddar and shredded american, and it melts much better.

Basically, I had some leftover lasagna noodles and sauce, but was out of mozzarella and ricotta cheese.

I did, however, have some cheddar melt. So I baked the noodles and sauce, topped with cheddar melt!

There you go, cheddar melt lasagna.

Friday, November 11, 2011

Pot Lasagna

No, I'm not talking about "pot lasagna" like special brownies.

I had planned to make a crock pot lasagna recipe for about a week, and bought all the ingredients.

But then it occurred to me, how would cooking in a slow cooker affect the way the cheese melts?

I like the way cheese melts in the oven. I can't imagine cheese melting the same way in a crock pot.

So I compromised by making the recipe in an uncovered cast iron pot, in the oven.

Boil the lasagna noodles separately; add salt and olive oil to the water.

Make the sauce in the pot. Brown 93% lean ground beef, chopped onions, minced garlic.

Add garlic powder, onion powder, salt, black pepper, oregano, and basil.

When it's done, add a can of tomatoes and a jar of sauce.

Take some of the sauce out and put it in a bowl, leaving a layer of sauce on the bottom.

Then add a layer of ricotta cheese, a layer of noodles, another layer of sauce, cheese, noodles.

Top with mozzarella cheese. I used Kraft shredded cheese with a hint of cream cheese.

Bake in the oven at 350 until done.

It was quite good. Because it wasn't in a shallow pan, it wasn't perfectly cubed. Who cares.

Wednesday, November 2, 2011

grilling fish on a plank?

Last night I tried grilling fish on a plank for the first time.

In fact, "on a plank" is a very popular method of cooking fish.

But, as the plank was made of wood, it caught on fire, and it wasn't really cooking the fish anyway.

So I put out the fire and finished the fish on the grill.

But what did I do wrong? I soaked it in water beforehand like I was supposed to.

And the plank was cedar, which is the recommended wood for plank grilling.

The instructions said to soak it for 20 minutes, but that was nowhere near enough.

It was suggested to me, to soak it for 24 hours, then remove, dry, and brush with olive oil.

So I'll try that next time.

You can also soak it in wine, juice, or beer instead of water.

The volcano cooking tent


This is a demonstration of the volcano cooking tent being used.

It covers your grill to create a "convection oven" effect. Very handy when grilling food.

I had concerns about the wind blowing it away, though. Not sure how to handle that.

I also had concerns about it catching fire, but the material inside is flame resistant.

Note that it gets very hot, so use oven gloves when taking it off, and don't touch the inside!

seventh recipe created by me: black bean and tomato dip

This recipe was created this morning on a whim.

I was going to make some more salsa to enjoy with my chips, but I had a can of black beans.

So I mixed the black beans drained, 2 roma tomatoes, cilantro, and minced garlic.

I tried it and decided something was missing, so I added a half a jalepeno pepper, like I do for salsa.

I don't normally include peppers in anything; I make an exception for salsa.

I could have added onion, but I didn't. Add it if you want.

This is essentially, my salsa without the onion, less tomato, and black beans.

Black bean and tomato dip!

sixth recipe created by me: blue corn chip pie

This was a recipe I created a while back, from white chili that was made by someone else.

White chili is chili with chicken and white beans, instead of beef and pinto or red beans.

I didn't actually make the white chili, and it's not my first choice; Someone else had made it.

I decided to spruce it up by making a "frito pie", except I used blue corn chips instead of fritos!

Basically, take the white chili, add shredded cheese, sour cream and blue corn chips.

There you go, blue corn chip pie!

Monday, October 31, 2011

my first shrimp scampi

Inspired by the recent shrimp scampi recipe contest, I decided to try making shrimp scampi.

I made a modified version of the contest recipe from the Lodge website.

This was also the first time I salted the pasta water, rinsed the pasta, and tossed it with olive oil.

I liked the results!

Boil linguine in lightly salted water until done. Drain, rinse, drain again. Toss with olive oil.

In a cast iron skillet, melt 6 tbsp butter and 4 tbsp extra virgin olive oil.

Add 3-4 tbsp minced garlic and saute. Don't overcook the garlic. Add black pepper.

Add peeled and deveined shrimp, and cook until done.

I used pre-cooked shrimp, so it was faster for me.

Turn off the heat. Add 1/4 cup lemon juice and shredded parmesan cheese.

I added bacon bits to mine, even though shrimp scampi doesn't normally have bacon bits.

It was thinner because of the lemon juice, although it did add a nice little flavor.

I like a thick sauce, so next time I might omit the lemon juice, or add a lot less of it.


Saturday, October 29, 2011

and where are my mexican dish recipes?

I could have sworn that I posted my recipe for various mexican dishes.

But all I could find was the one for cheese enchiladas.

So, what I do for mexican food is, first make my "base", then use it in whatever mexican dish I make.

The "base" is 93% lean ground beef, browned along with chopped onions, minced garlic, and fresh cilantro.

Add chili powder, cumin, coriander, onion powder, garlic powder, oregano, salt, pepper.

Then I take pinto beans, and either mash them up to resemble refried beans, or just add them whole.

That's my "base".

Notice that's how I started my chili recipe; Add ingredients for chili, and it becomes chili.

But it's also how I make burritos:

Put the base in flour tortillas; add cheese, add salsa or taco sauce, bake in the oven at 350.

Make tacos by putting the base in taco shells; add cheese, tomatoes, and sour cream.

Make enchiladas by putting the base in corn tortillas, add cheese and enchilada sauce, and bake.

Make tamale casserole by layering polenta over the base; bake in the oven at 350.

Make nachos by pouring the base over tortilla chips; add cheese and bake.

Make "border patrol casserole" with tortilla chips, cheese, and black olives on top of the base; Bake.

I serve all of the above with sour cream. You have to have sour cream!

I lost my recipe for chili!

Well much to my dismay, I discovered yesterday that I lost my recipe for chili.

So I had to come up with another recipe. But the good news is, it was a vastly improved recipe!

Brown 1 pound 93% lean ground beef* in a cast iron pot, along with chopped onions and minced garlic.

*I love 93% lean. If you use it, you don't have to drain.

Add chili powder, cumin, coriander, oregano, onion powder, garlic powder, salt, and black pepper.

Add 1 can of diced tomatoes, undrained, and 1 can of pinto beans*, undrained. Because they're undrained, you won't need to add any broth.

*My former recipe used red kidney beans.

If you don't want beans, you'll need to add a little beef broth. I like it with beans.

Add 1 8 oz can of tomato sauce. Stir and simmer on low heat.

Serve with sour cream, shredded cheese and fritos!

Some people like to add a tablespoon or two of corn flour or "masa", but I didn't have any.

And, some people like to add green chilis or bell peppers. I loathe peppers, so I don't.


Friday, October 28, 2011

The Fried Chicken question

Someone posted a question to the Lodge facebook page, about their fried chicken recipe.

The question was about the part where you cover and cook on low heat for 45 minutes.

She wanted to know, does that mean removing from the fryer and finishing in the oven?

I believe they mean leave it on the stove on low heat for 45 minutes, but it got me thinking.

What if you do want to start it on the stove and finish in the oven? How would it turn out?

The advice I've received was, fried chicken in the oven COVERED, is not a good idea. It will get soggy.

However, if you remove it from the fryer when it's almost done, put it on a flat cast iron pan, in the oven on very low heat, that will make the chicken crispier.

The basic method is, brown on higher heat, simmer on lower heat, then raise the heat and uncover to crisp. I like the idea of crisping in the oven so it doesn't spatter.

I haven't tried the Lodge recipe for fried chicken, but I'd like to.

You can find the recipe here.


Wednesday, October 26, 2011

the "leftover batter" pan


This is allegedly a "griswold leftover batter pan."

I say "allegedly", because Griswold never made a leftover batter pan.

It's a fake. It's a made in China, 3 mold cornstick pan.

If you see this pan listed anywhere, don't buy it.

However, there is an alternative on the market, that you can use.

Lodge makes a 5 mold cornstick pan, that I find is great for using leftover batter.

I was torn for a long time, as to whether or not to get that pan-- after all, I already had a 7 mold and a 9 mold.

But, I'm a cast iron fiend, so one day I broke down and got it. And, it's a great leftover batter pan!

the new Lodge carbon steel skillets

This is the new Lodge carbon steel skillet. There are three sizes: 8 inch, 10 inch and 12 inch.

They are made in the USA and are the only "pre seasoned" carbon steel pans in existence.

I'm not familiar with carbon steel, but I am aware that it has to be seasoned, just like cast iron.

These pans are pre seasoned. They can be used outdoors, on the stove, or in the oven.

I've never used carbon steel, but I know that carbon steel woks are very popular.

Carbon steel, while thinner than cast iron, can withstand very high heat.

As it's thinner, it does not retain heat as long as cast iron does.

I'm thinking that these pans would be useful for sauteing and stir frying.

These pans remind me of the super lightweight cast iron pans available.

I'd like to try one of these pans. I'd probably get the 12 inch, myself.

the Lodge stainless steel cookware set.

This is the Lodge stainless steel cookware set.

"But I thought Lodge was a cast iron company!" It is, hence the cast iron skillet in the set.

They don't sell the stainless steel pieces individually; Just the set.

It includes the cast iron skillet, along with a deep skillet, 2 saucepans, and a pot.

Personally, if I didn't already have all the cookware I need, I'd consider buying it.

I wondered why Lodge wants to branch out from their flagship product line of cast iron.

My guess is because many consumers tend to shun cast iron cookware, as antiquated. They want "modern" stuff, such as stainless steel.

But why include a cast iron skillet in the set?

Perhaps to introduce cast iron to a market segment that would otherwise not try it.

I once was one of those people, after all. It only took one try, before I was hooked for life!

Beef n' beans

This is a slow cook, one pot recipe called beef n' beans. It's literally, ground beef and beans!

You need one pound of ground beef; I use 93% lean. Brown the ground beef on the stove first.

Then add to a cast iron pot*, along with 1 can** of black eyed peas, 1 can of pinto beans, 1 can of tomatoes, 1/2 an onion chopped, 1 cup of salsa***, 1 cup of rice, and 1 cup of water or broth.

*You can just brown the beef in the pot and then throw the other stuff in. If it's 93% lean you don't need to drain.

**If you have dried beans cooked ahead of time, that will also do. You can use any beans you want.

***I used homemade salsa; Jarred salsa is terrible.

Season with salt, black pepper, onion powder, and garlic powder.

Slow cook in the oven for a few hours.

I found that it needed some seasoned salt when it was done.

I also made some extra white rice on the side to go with it, because I like a lot of rice.

Friday, October 21, 2011

Lodge shrimp scampi recipe contest

This is a picture of a shrimp scampi recipe, made in the Lodge chef skillet.

I've never made shrimp scampi, although I do like it and now I want to make some.

Anyway, there's a contest going on:

Whoever can figure out the ingredients to this recipe, wins a free Lodge guitar skillet. Woo hoo.

Actually, this is the recipe, copied and pasted from the Lodge website:

Kosher salt
1 1/2 pounds linguine
5 tbsp good quality extra virgin olive oil
6 tbsp unsalted butter
3 tbsp minced garlic
2 pounds peeled and deveined shrimp
1/2 tsp coarsely ground black pepper
1/4 tsp crushed red pepper flakes (I don't like them so I'd leave them out)
1/4 cup flat leaf parsley
1/4 cup freshly squeezed lemon juice
1/4 cup freshly grated parmesan cheese

Bring a pot of water to a boil with 1 tbsp kosher salt in it. Add the pasta and boil until al dente.

Drain, rinse in cool water, drain again, and toss with 1 tbsp olive oil.

Melt the butter with the remaining olive oil in a cast iron skillet over medium high heat.

Add the garlic and saute for 3 minutes.

Add the shrimp, 1 tsp kosher salt, and the pepper. Saute the shrimp 5 to 7 minutes.

Remove from heat and toss with the remaining ingredients.

That was the Lodge website recipe. If I were to do this, I'd probably modify it a bit.

I definitely don't like crushed red peppers so that would be out.

And I don't like parsley either, so I never include that. I wonder how cilantro would taste?

I'd probably add bacon bits, even though that's not usually included in shrimp scampi.

And what about whole garlic cloves? You would need to slow roast them ahead of time in olive oil.

At first I was under the impression that you make up your own shrimp scampi recipe for the contest.

But no... the contest is to figure out their recipe, which I just gave you.

And someone's already figured it out, so they're probably going to win the guitar skillet.

Frankly, if I saw a use for the guitar skillet I would have bought it already. So no real loss to me.

But if anything, at least it's made me want to try making shrimp scampi, which may have been the point.

Wednesday, October 19, 2011

oriental chicken

This recipe was meant for chicken wings, but I made drumsticks instead.

In a bowl, mix a 2:1 ratio of soy sauce and water or broth. You need at least a cup of soy sauce and 1/2 cup water or broth.

I used beef broth because that's what I had, although chicken broth would be perfect.

You need enough to cover the chicken; I found the part of the chicken that was not immersed in the liquid to be dry, while the part that was immersed, was wonderful.

Add brown sugar, a shot of lemon juice, dry mustard*, minced garlic, ginger, onion powder, garlic powder.

*Regular mustard will also do.

Put it all in the cast iron pot and slow cook until the chicken is done.

This recipe came out of a crock pot cookbook, so it can be done in a crock pot too.

Someone suggested it be done with a whole chicken.

You would either have to inject the marinade, or use a LOT of soy sauce!

Saturday, October 15, 2011

Reducing all your cookware to just cast iron?

I was in an online discussion earlier, about reducing ALL of your cookware to cast iron.

Is it possible? Is it practical?

Well, I've just about got it, actually. There actually are a few pieces I have that are not cast iron:

1. One rectangular pyrex pan, for turkey or whole chicken prep.

You need a pan to defrost turkey or whole chicken in the fridge, to catch the juices; Cast iron isn't practical for that due to rust issues.

Then I cut, rub, and season in the pyrex pan, before transferring to a large skillet for roasting.

2. One 3 quart stainless steel saucepan, for boiling stuff.

I would NOT boil beverages, or water for drinking purposes in cast iron, because the seasoning dissolves into the water. That makes me gag, just thinking about it.

Boiling in cast iron doesn't have any effect on the flavor, as it does with other cooking methods.

I used to use it for plain, unseasoned white rice, until I started using the electric rice cooker.

3. One pasta pot with a perforated lid, for plain, unseasoned pasta.

You could cook pasta or white rice in cast iron, as long as you use broth instead of water.

Otherwise, the seasoning in the pot will affect the flavor, and it will no longer be "plain and unseasoned".

4. One stainless steel turkey fryer pot. There are no cast iron turkey fryer pots.

Turkey frying pots have to be large enough to completely immerse the whole turkey in hot oil without dangerous spillovers, and slender, to save expensive peanut oil.

5. One stainless steel steamer pot, not that I steam much anyway.

It has a double boiler insert-- not that I double boil much anyway!

Steaming in cast iron doesn't have any effect on the flavor either. I find steamed food bland.

6. A couple of microwavable bowls, since you can't microwave in cast iron.

That's it! Everything else is cooked in cast iron.

But what about cake pans? Bake cake in a skillet! Sure they'll be round and not square, who cares?

I recommend one enameled pot, for making jam and scratch tomato sauce.

I don't have a crawfish boiling pot. Those are minimum 80 quarts with a drain basket.

But if I did, it would be stainless steel because there are no cast iron crawfish boiling pots either.

I wish I still lived in a place where I could get crawfish to boil. But I don't, so can't justify getting one.


Sunday, October 9, 2011

seriously, hot dogs boiled in coca cola?


I saw a picture on facebook of someone boiling hot dogs in coca cola, in a cast iron pot.

And I thought, seriously, hot dogs boiled in coke? Nevertheless, I had to try it.

But I was sacrilegious... I used a stainless steel pot instead of cast iron. Why?

Because it leaves a very sticky substance on your pot.

And I didn't feel like scrubbing sugary, sticky stuff off my cast iron today.

Besides, boiling in cast iron has no effect on the food flavor, as frying or roasting does.

You simply boil the hot dogs until the coca cola has evaporated.

I stopped when there was about 1/3 of it left, but it could have kept going.

They tasted like, well, hot dogs. That were boiled in coca cola.

After letting them sit for a while in the thickened coca cola, I tried another one and it had a sweet flavor.

You can cut the hot dogs in pieces, and cut slits on each end, before boiling. It lets the flavor seep in.

I bet ribs would be good roasted in coca cola.

Monday, October 3, 2011

Fifth recipe created by me: Bacon salmon

This recipe was created by me this evening, part by necessity: Bacon salmon.

See, after scorching the bottom of my camp oven dish last night, I wanted to fry some bacon in my 12 inch camp oven to help re-season it.

So I was planning to have a "breakfast for dinner" night, in which I would serve eggs and bacon and toast, and maybe pancakes too if I felt like it.

But my other half wanted salmon, so he asked if I could make something with salmon AND bacon.

I thought that sounded kind of weird, but wasn't opposed to the idea.

The result was the fifth recipe created by me, which is Bacon salmon.

It's very simple: You season a salmon fillet with black pepper and spray with olive oil Pam.

Bake it in the oven at 350. While it's baking in the oven, fry some bacon on the stove.

Put the cooked bacon over the salmon fillet, and serve.

Alternatively, you can wrap the raw bacon around the salmon and bake it in the oven at 350.

But, I wanted to fry the bacon, so that's what I did.

Volcano Stove 101, for Dummies


This is a volcano stove.

I've written several articles about the volcano stove, as I've been using it and trying to learn about it.

If you search the internet, you'll find a lot of hype, but very little real practical info.

What is available, tends to be ambiguous, and as I discovered, very frustrating for the beginner.

So this article is meant to be a compilation of practical information that I've learned, based on my recent experiences, that is not found anywhere else.

First, as is widely known, the volcano stove can be used with wood, charcoal, or propane.

It can be used as a grill, or as a stove, using all three types of fuel.

You can take the top grill off and set a wok in it, for stir frying.

There is a "vent" you can open or close. Closing the vent reduces heat. Right is open, left is closed. It's the opposite of "righty tighty, lefty loosy".

If you want to use wood, be sure the pieces are cut to less than 12 inches so they'll fit.

If you want to use charcoal, be sure you put the CENTER PLATE* in place, and put the coals on that. If you don't, it will not get hot enough.

*I know the manual says to put the coals on the bottom-- Don't. It will NOT get hot enough.

This applies whether you are stir frying, grilling, using as a stove, or dutch oven cooking.


If you want to use propane, do NOT use the center plate, for grilling or stir frying.

Only if you're using it as a stove, and want lower heat. The center plate diffuses and reduces heat.

DO NOT use propane for dutch oven cooking. It does not work.

Only use coals for dutch oven cooking. Put coals on the CENTER PLATE, and the pot* over the coals.

*If your pot does not have legs to hold it over the coals, then use a trivet.

Because the volcano is more energy efficient, you won't need as many coals.

Use about 80% less coals than the traditional coal chart, subject to your altitude.

That's a rough estimate; Unfortunately there is no "volcano coal chart". There needs to be.

You have to use an infrared thermometer to monitor the temperature and adjust the coals accordingly.

Use 2/3 on top, and 1/3 on bottom. Ignore the claims about "no top heat." Yes, you do need it.


There is a "middle grill", sold separately, which can go in the same place as the center plate.

There is also a "volcano lid", sold separately, which is a "tent" that allows for convection cooking.

If I can come up with any more helpful info, I'll post it here.

But hopefully, this will give you a good start.

Sunday, October 2, 2011

camp oven cooking using propane-- don't do it


I originally got the volcano stove, intending to use it for camp oven cooking, using propane.

I don't know if it's recommended for that use or not, but, no one has said you couldn't.

So I tried it for the first time tonight.

In a previous post, I pointed out that you need the center plate, in order to support the camp oven over the propane burner.

I was concerned that it would make the temperature too low, since the center plate reduces heat.

I very quickly realized, that wasn't the issue at all-- it got plenty hot enough.

In fact, I was unable to bring the temperature down!

I constantly monitored with my infrared thermometer and it got progressively hotter.

I tried closing the vents (right is open, left is closed-- the opposite of righty tighty lefty loosy).

I tried turning the needle valve down on the regulator.

Both steps helped temporarily, but the temperature climbed back up again.

Another thing I noticed was that there was significantly more heat on the bottom, than on the top.

For camp oven cooking, you normally use more heat on top to create the "oven" effect.

I finally had to turn it off because it was starting to burn on the bottom.

The meat was undercooked, which since it was beef, was OK because I like medium rare.

If it were chicken or pork, it would not have been edible.

I conclude that, with the propane burner, you cannot get the temperature low enough to do the "slow cooking" that camp oven recipes require.

It works fine as a propane stove, and would be fine for stir frying using propane.

But camp oven cooking over propane, I absolutely do not recommend.

The recipe I used was a souped up version (literally-- no pun intended) of flank steak and onion sauce.

I melted butter in the camp oven, browned pieces of chuck roast* in the butter.

*chuck roast is cheaper than flank steak, so I used that.

Then added canned potatoes, chopped onions, minced garlic, cream of onion soup diluted in milk.

This time I added Lipton onion soup mix. Hence, literally a "souped up" version.

You can use the volcano for camp oven cooking using coals.

You just need different amounts of coals than you normally would, if you weren't using the volcano.

And, if you have the time and patience to teach yourself this whole new system, more power to you.

I'm still learning the traditional method of coal cooking, myself, and I think I'll stick to that.

I will still use the volcano as a propane stove.

It's a very useful propane stove, even though I already had one. So, now I have two.

And I will still use it as a portable charcoal grill, even though I have a Lodge charcoal grill.

So, now I have two charcoal grills.

And I will still use it to stir fry outdoors, when and if I decide to stir fry outdoors again.

Although that wasn't what I originally got it for.

Thursday, September 29, 2011

lemon olive oil

In the grocery store yesterday, I sampled some pasta tossed with lemon olive oil.

I liked it so much, that I wanted some. But not at the outrageous price of $12.99!

As the ingredients on the bottle read "extra virgin olive oil and fresh lemon juice", surely I could make my own.

One friend suggested a 2:1 ratio of lemon juice to olive oil. In other words, 1/2 cup juice, 1/4 cup oil.

That mixture was way too strong on the lemon side. Too tart for me.

So I would recommend a 1:1 ratio, as in, 1/4 cup lemon juice to 1/4 cup olive oil.

Add garlic salt or minced garlic if you wish, and toss with pasta and black olives.

Add parmesan cheese and bacon bits.

My first cajun rice (or "dirty rice")

I made my first cajun rice, also called "dirty rice." It was hands down the best I ever had.

I used the Lodge 3 quart chicken fryer but it can also be done in a dutch oven or camp oven.

I browned 1 pound of 93% lean ground beef, along with chopped onion and chopped green onion.*

*Some people add chopped fresh mushrooms and/or minced garlic.

Added cajun seasoning, salt, pepper, onion powder, garlic powder.

When it was done, added 1 cup of white long grain rice and 2 cups of beef stock*.

*Some people use canned onion soup instead of beef stock.

Bring to a boil, reduce heat, cover, simmer until the rice is cooked.

During cooking I added a little more beef stock.

I know dirty rice doesn't normally contain cilantro, but I bet it would be good!

Wednesday, September 28, 2011

the Lodge 12 inch deep, 8 quart camp oven


This is the Lodge 12 inch deep camp oven. It's 8 quarts.

The Lodge 14 inch regular camp oven is also 8 quarts.

Those are the only two 8 quart cast iron pots available, that I personally know of.

And they're both camp ovens.

Most cast iron indoor pots sold today, are 5 quarts or 7 quarts.

There might be enameled 8 quart pots, but I'm talking about regular cast iron.

For a while, there was a pot advertised as 8 quarts, but it was actually less than 7 quarts.

On a regular basis, pots are listed on ebay as "8 quarts" because of the #8 marking; Those pots are 5 quarts!

A Griswold #11 dutch oven, if you can find one, is 8 quarts. They are rare and expensive.

Occasionally I search ebay, only to find one for over $100 or more. No thanks.

After the year long fiasco of trying to find a 6 quart pot, and then finally getting one, I'm not sure I want to look for an 8 quart too.

What's the deal? Doesn't anybody like 6 and 8 quart pots? Why are they the red headed stepchildren?

Actually what prompted this article, was a member of a cast iron group I'm a part of, sent a message asking if anyone has an 8 quart pot they're willing to donate.

Well, yes I technically have one, although it's a camp oven. And no, it's not for giveaway.

But, because they're so hard to find, if anyone has an 8 quart pot they're willing to donate to ME?

I'm not very hopeful for a response to that. As if I need another pot.

Tuesday, September 27, 2011

the volcano jr.


This is a volcano jr. I don't have one, and they're discontinued so there's no way to get one.

The company is talking about bringing them back, if they think it will sell.

It's meant for smaller pots. It can fit a 6 inch camp oven, or an 8 inch.

Note the support brackets in place to fit the 6 inch oven; For an 8 inch, you don't use the brackets.

It does not use propane; It only uses charcoal or wood.

It came with a grill top, to use as a tiny grill or stove.

It sure is cute. I'm not sure if I'd have use for one or not.

I wonder if you can use a 6 inch camp oven on the regular volcano.

I imagine you can. I guess I better try it sometime and find out.

Saturday, September 24, 2011

First use of the volcano as a propane stove


I've used the volcano as a propane grill; Today was the first time using it as a propane stove.


You can't really see the eggs in the pan, due to the sun's glare.

That was before the yolks broke. I hate that!

I cooked the bacon, and the eggs 2 at a time. I prefer to only handle 2 eggs at a time, when flipping. Scrambled is faster of course, because you can cook more at a time.

You can see where cubed potatoes would have also fit in there, for hash browns, but I didn't have a potato.

Anyway, this time I did not use the volcano's "center plate", which reduces heat.

I'm still learning the ins and outs of this thing, but I've found that when cooking with charcoal, it's better to use the center plate and put the coals on that, instead of the coals on the bottom without the center plate. Otherwise, it doesn't get hot enough.

And when you're using it for a propane stove or grill, apparently you do NOT use the center plate, unless you intend to "slow cook" on low heat. Because, it doesn't get hot enough!

I haven't tried it using propane and a camp oven; I imagine you'd need the center plate to support the pot, but what about temperature?

That's what I'll have to find out*.

*Even with the center plate, it was too hot for slow cooking in a camp oven. Don't do it.

I predicted that the volcano is better suited as a propane stove, than as a propane grill.

It is a good propane stove. It does work as a propane grill too, just wouldn't be my first choice.


Monday, September 19, 2011

new way to make catfish

This recipe I came up with for catfish fillets, is very similar to my batter baked chicken.

I used corn flakes as a "batter", but didn't exactly crush them.

I just poured the corn flakes on the fillets, and sprayed olive oil Pam.

Then I flipped the fillets and did the same thing on the other side.

Baked at 350 until done.

I found it to be quite tasty and crispy.

I loved the way the fish oil seeped into the corn flakes and gave it a slight fish flavor.

Saturday, September 10, 2011

Learned a new way to roast chicken

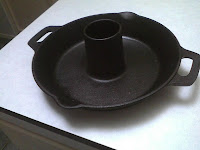
This is the Emerilware vertical poultry roaster. I actually did not roast chicken in this tonight.

I learned a new way to roast chicken, based on this video, and decided to try it out.

Of course, you need a cast iron skillet; He recommends the Lodge 12 inch skillet.

First you preheat the skillet in the oven at 500 degrees.

Coat the chicken with salt, pepper, and olive oil.

Feel free to add your own seasonings, or coat with melted butter instead.

Remove the skillet and put the whole chicken in, breast side up. Hear it sizzle!

Since dark meat takes longer to cook than white, you need to have the dark meat touching the hot pan.

Brown at 500 degrees for 15 minutes*, then reduce the heat to 350 for another 25 minutes.

*I wonder, if I'd let it brown for 5 more minutes, would it have made the skin crispier?

When I checked the temperature after the timer went off, it was just under 170 degrees.

So to be on the safe side, I left it in the oven another 10 minutes.

He says "there should be just a hint of pink", but my husband will NOT eat chicken with any pink.

But even though I left it in for longer, it was a VERY juicy chicken!

Now I am left with a decision. I have not used my vertical poultry roaster in over a year.

I don't roast whole chickens very often, because de-boning whole chicken after dinner is a gross job.

I usually buy drumsticks or breast fillets. Chicken isn't my favorite thing, but I do like drumsticks.

So when I do decide to roast chicken again, I'm going to do it this way. I liked how it turned out!

And, this way is done in a regular skillet, not the vertical roaster.

Which is a "one trick pony", unless you want to make a donut shaped cake.

Actually, you could cook a lot of things in the base of the roaster; I just usually reach for a skillet.

And it's not Lodge, so I don't have many qualms about letting it go...

Friday, September 9, 2011

"liquid gold"

The recent advertisements for velveeta cheesy skillets, features a Lodge 12 inch cast iron skillet.

It portrays a blacksmith, calling it "liquid gold!"

Previously, since it reminded me of hamburger helper, I was not planning on trying it.

But, since the advertisement featured a Lodge skillet, that actually motivated me to try it.

You do need the Lodge 12 inch lid, as well as the skillet, to make velveeta cheesy skillets.

Just follow the recipe on the box.

I picked the cheeseburger macaroni, and added my own bacon bits.

I used 93% ground beef, which is what I use in all dishes calling for ground beef, except burgers.

It wasn't bad! I found it to be better than hamburger helper.

Not exactly something I'd cook every day, but not bad either.

See? Including Lodge skillets in your commercials really does work-- at least for one purchase, anyway!


Thursday, September 8, 2011

electric option for the volcano stove?


This is a volcano stove. It can be used with wood, propane, or charcoal.

I recently heard a rumor that the company was considering adding an electric option as well.

The company did inform me, that rumor is not true.

But it started me thinking: Would an electric option be a good idea?

For starters, the volcano is meant to be an "emergency preparedness" stove, for use when there's no electricity.

So, if there's no electricity available, how on earth would you use an electric burner?

Besides that, I do think it would be a neat "bell and whistle" option.

I would probably get one, just "because I can."

I have an electric outlet on my back porch, so it might be useful for summertime outdoor cooking.

This stove is also used for camping and tailgating, where electricity is not readily available.

The only way this idea would not flop, is to have the means to plug it into a vehicle, as well as a 120v receptacle.

That way, campers could plug it into their car, if they don't have a power inverter or generator.

But then, how many amps would it require, to generate the amount of heat needed to cook?

Would you need a "dedicated circuit"-- in other words, a receptacle not connected to any other wiring, so you don't pop a circuit breaker?

Yes, I'm a nerd and I ponder those things.

But for now, it's a moot point, because apparently there are no current plans for that-- for precisely the reasons I've mentioned.

Tuesday, September 6, 2011

using the volcano as a propane grill, take 2

So I decided to try the volcano as a propane grill for the second time, using my new burner.

I grilled steaks, marinated and seasoned the same way as last time.

The initial flame, when I lit it, wasn't as big this time.

The flame was blue, until I put in the center plate and it turned orange.

The company told me that's normal, because the center plate reduces the temperature.

I should have left it out*, but by the time I realized, it was too hot to remove.

*Here's what I've learned so far: you DO use the center plate for charcoal cooking, and put the coals ON the center plate; you DON'T use it for propane cooking, unless you intend to cook on low heat. I haven't tried it with propane using a camp oven yet.

I did notice fewer flare ups, but there were some; I don't think they can be completely eliminated.

It serves its purpose as a primitive, portable, hibachi style propane grill.

It still wouldn't be my first choice as a propane grill, but it works if you're tailgating or camping.

So, I stand by my original assessment that it's probably more well suited as a propane stove.

Now I can try camp oven cooking over propane*, which is the reason I got this in the first place!

*Don't use it for camp oven cooking over propane. Read my article to find out why.